The Importer Window
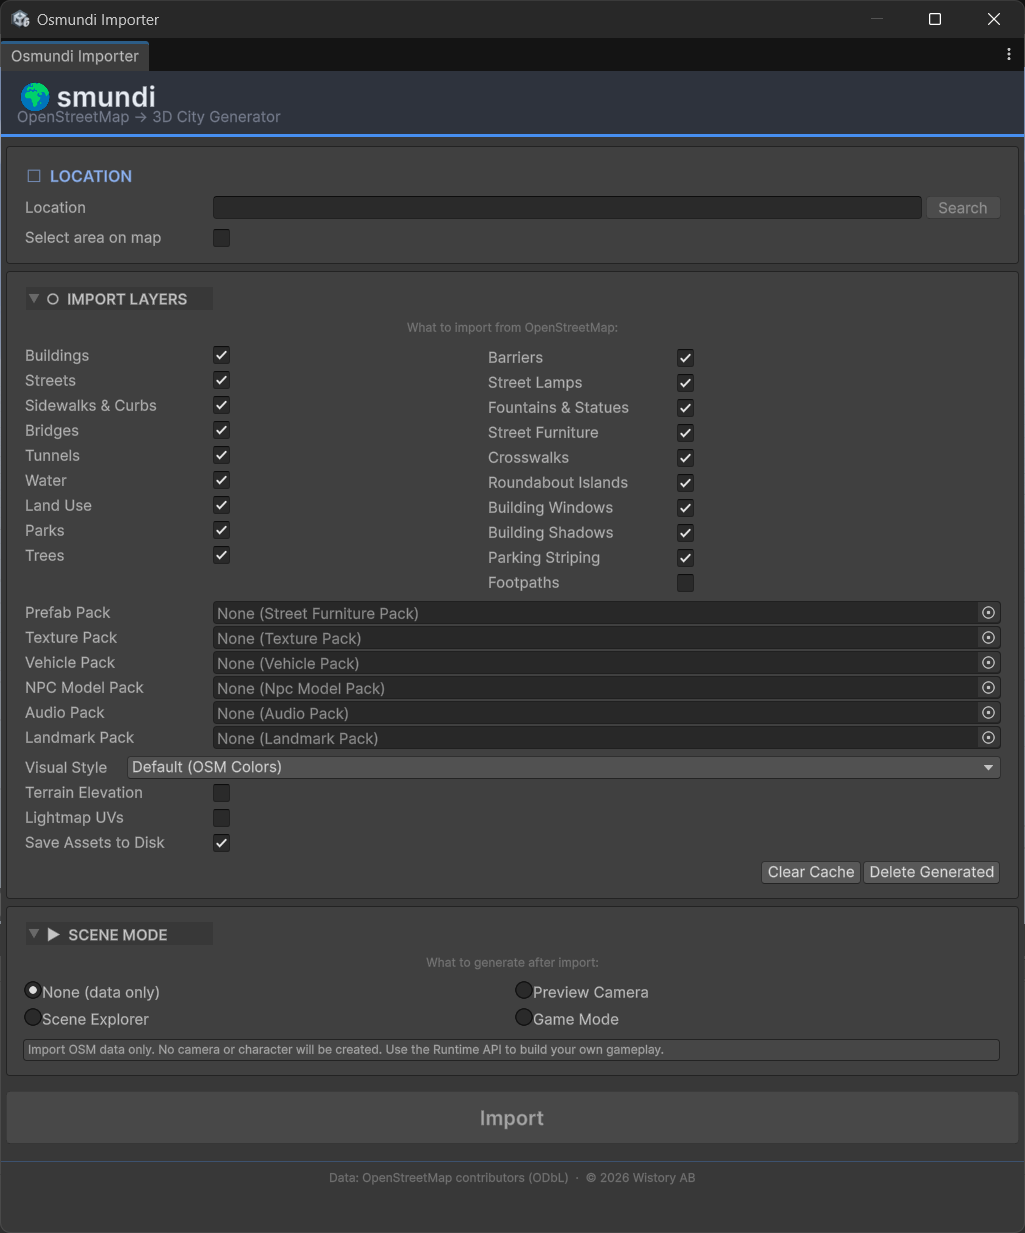
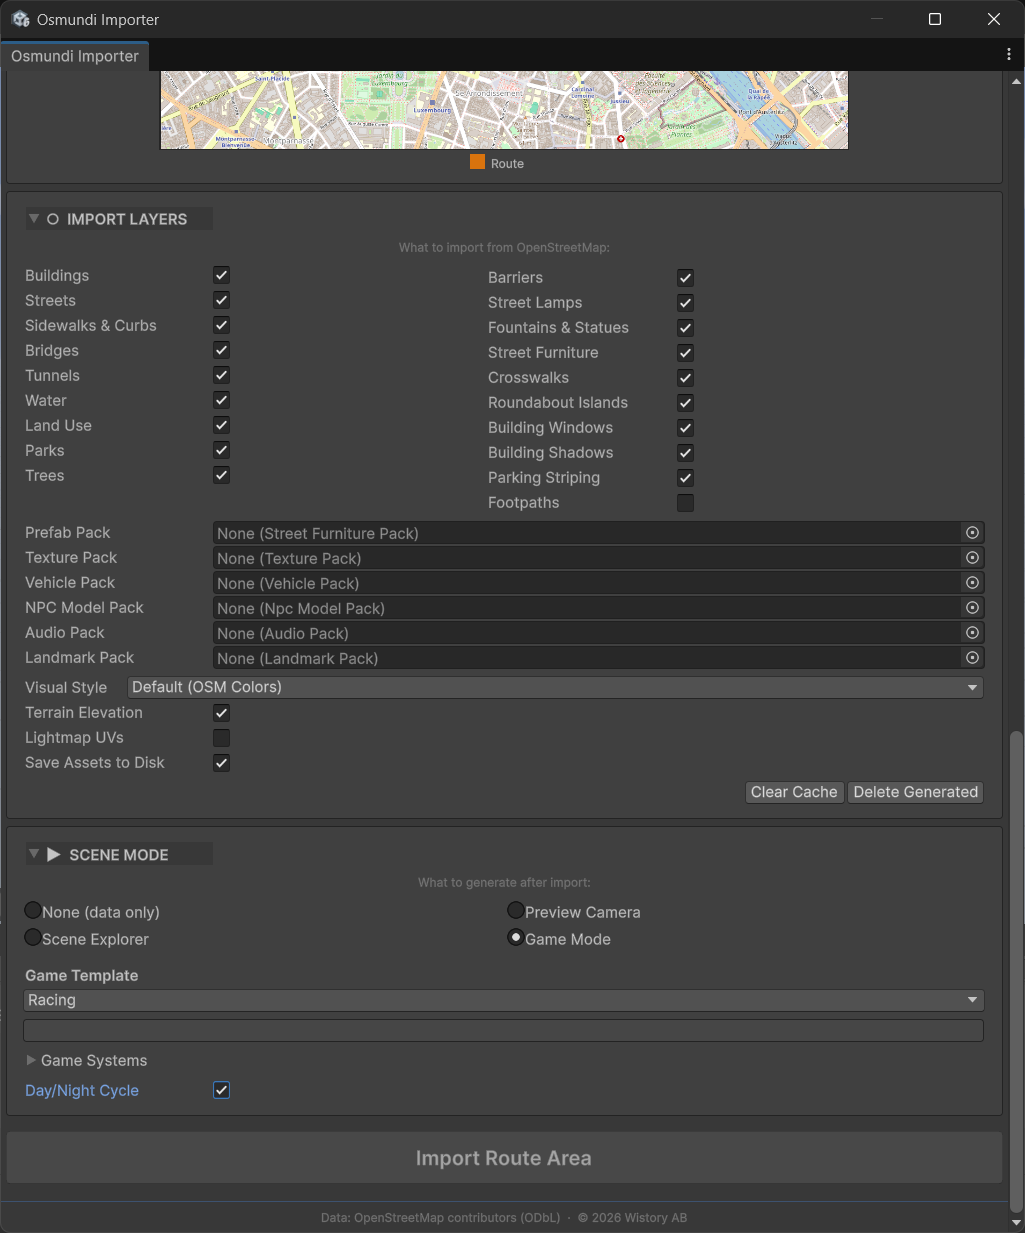
The main Osmundi importer inside Unity. Search for any city in the world, choose which layers to import (buildings, streets, water, trees, and more), select asset packs for textures and models, pick a visual style, and choose a game mode template. Everything is configured from a single window before you hit Import.
Interactive Map Preview
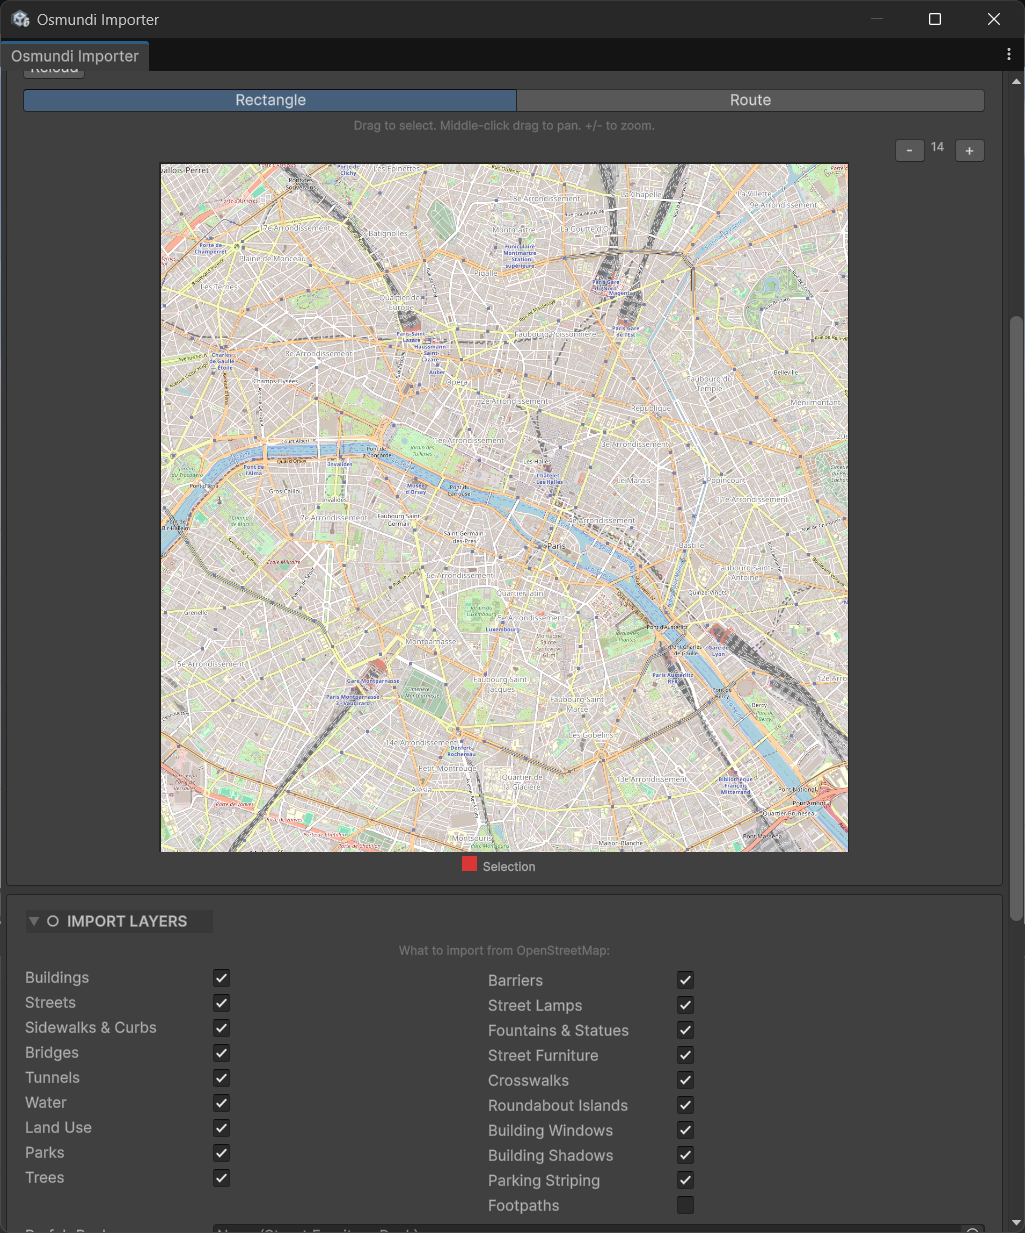
After searching for a location, an interactive OpenStreetMap preview loads directly in the editor. Pan with middle-click, zoom with +/-, and switch between Rectangle and Route modes to define your import area. The import layers panel below lets you toggle exactly which city features to include.
Rectangle Selection
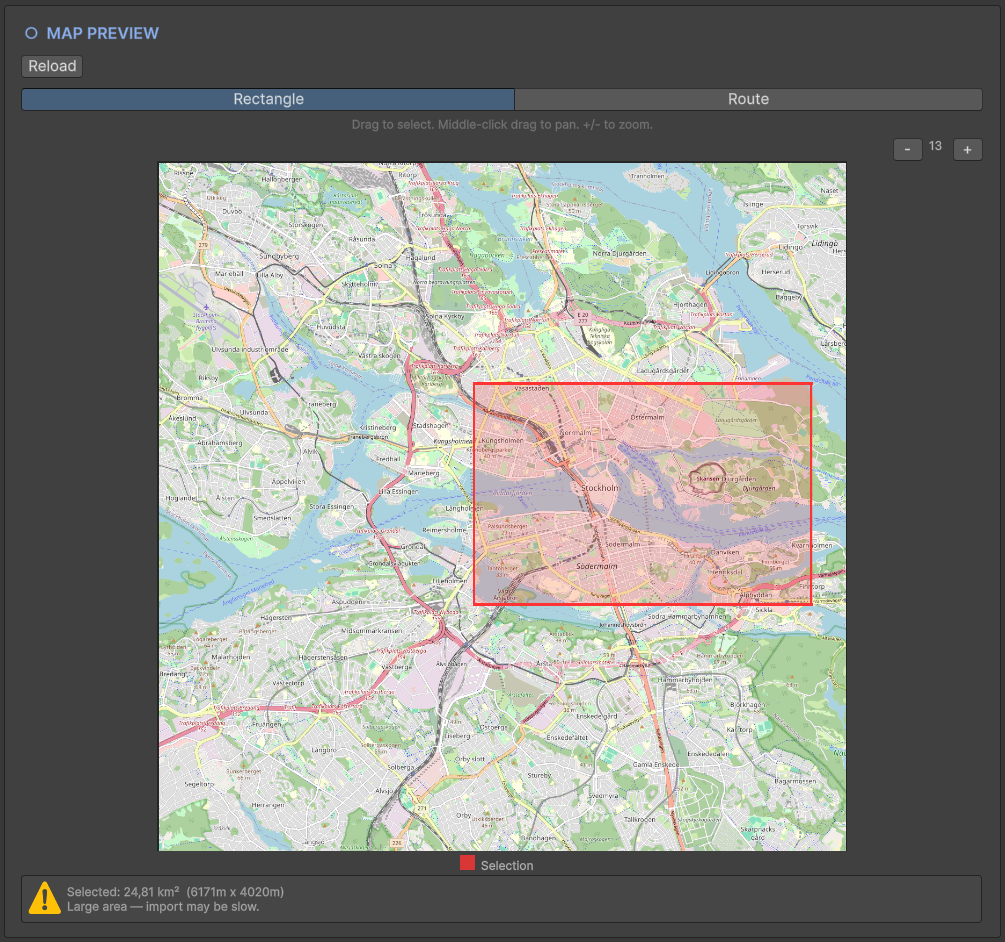
Drag to select an area on the map. The selection shows the area size and warns you if the selection is large. Small areas import in seconds; larger cities may take longer as they pull more data from the Overpass API. You can select anything from a single neighbourhood to an entire metropolitan area.
Route Drawing
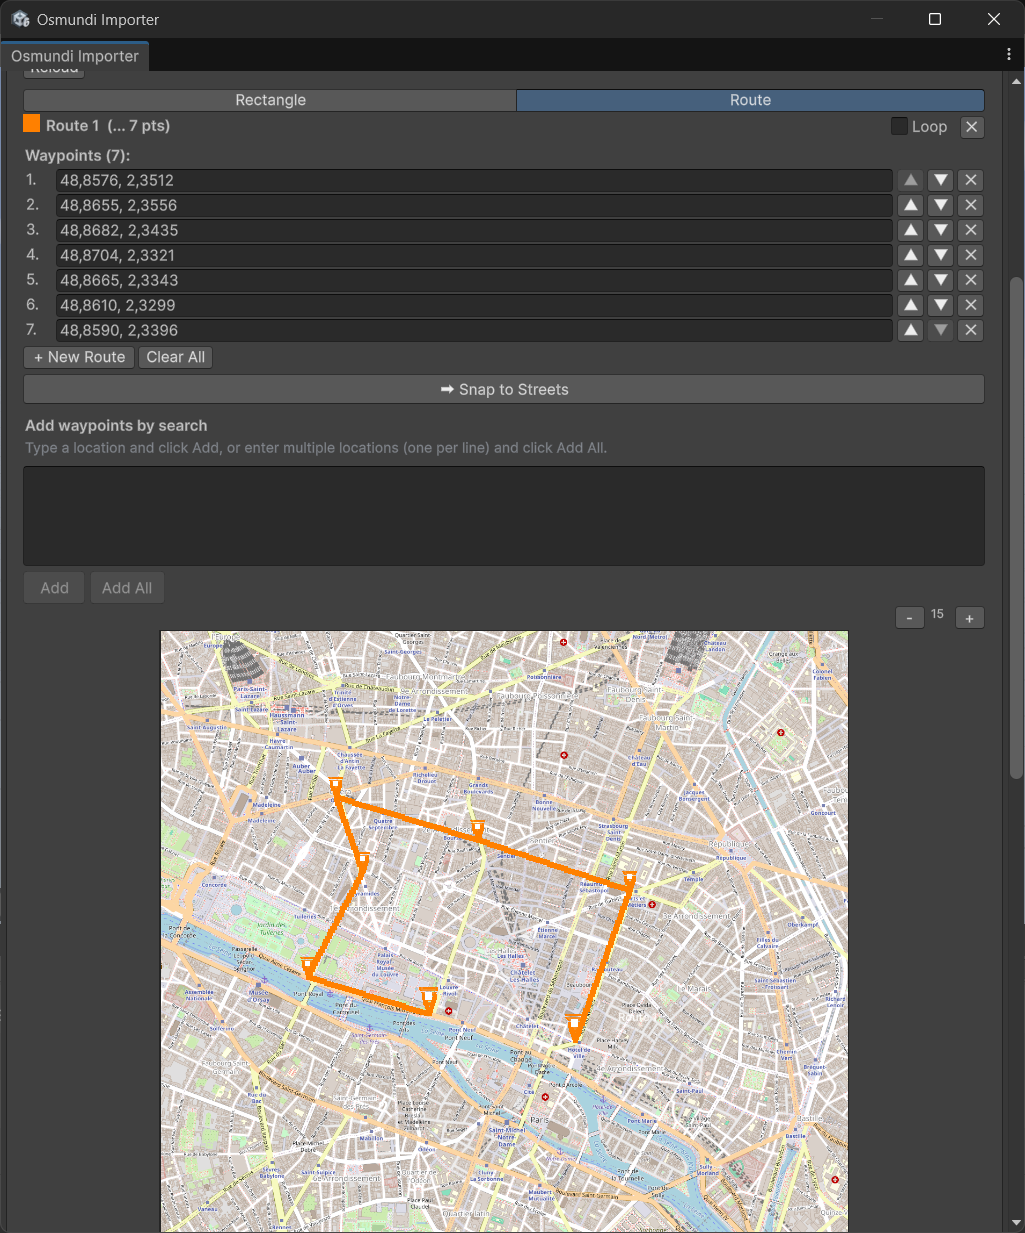
Switch to Route mode to place waypoints on the map and create a path through the city. The route is used for Racing and Scene Explorer game modes. Waypoints are editable — rename, reorder, or delete them from the list. You can also add waypoints by searching for locations, or paste multiple locations at once for batch import. Use "Snap to Streets" to align the route to the actual street network.
Import Options and Game Mode
Below the map, configure everything before importing. Choose asset packs for textures, vehicles, NPCs, and audio. Select a visual style (Default, Illustrated, Neon, or Pencil). Pick a scene mode — from Open World with full game systems, to Preview Camera for just exploring the scene. The game template sets up all the necessary components automatically.
Editor Menu
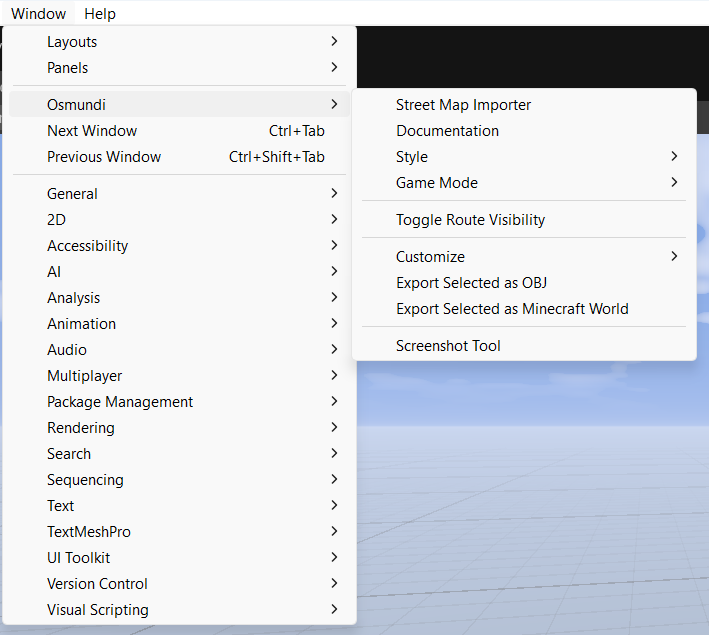
After importing, the Osmundi menu gives you quick access to everything. Switch visual styles and game modes on the fly, toggle route visibility, customize the scene with the artist tools, export to OBJ or Minecraft Java Edition, and take screenshots. All accessible from the Unity menu bar under Window > Osmundi.
Flight Simulator at Night
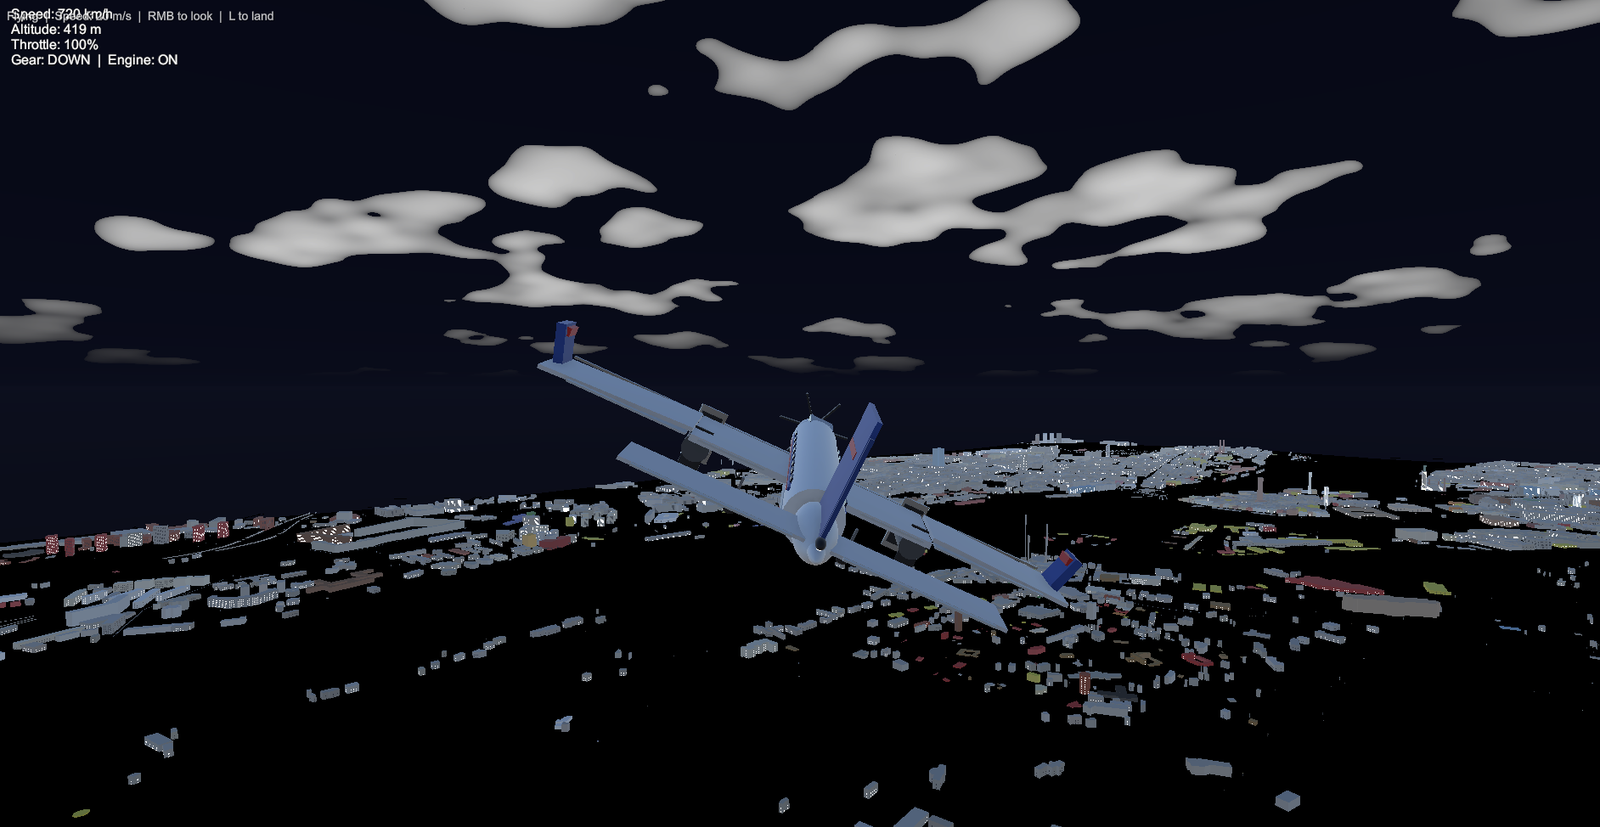
The flight simulator game mode in action — flying over a generated city at night. The HUD shows speed, altitude, throttle, and gear status. The city below is lit with street lamps and building windows. Volumetric clouds drift overhead. The plane features full flight controls with throttle, pitch, roll, yaw, landing gear, and a cockpit view.